This content of this site is still in development.
Moving Assets
Moving assets in Cascade allows you to reorganize how your site is structured and where different sections or pieces of content are stored. Cascade reference all internal links to any asset by an internal ID. When you move items around the ID moves with them so that Cascade can keep all reference to the correct asset in place. This means if you link to a PDF using an internal link and later move the PDF, Cascade will still link to it correctly.
- In the Site Content panel on the left, simply click the file you want to move and drag it to the new location.
- Once you drag the file you will see a “Move page” interface pop up, confirm the New Folder is correct and click the blue box that says “Move”
- You should now see a “Asset successfully moved/renamed” alert at the bottom of the browser.
- In the Asset Tree click on the item you want to move or rename. (This can be a page, folder, file, etc.).
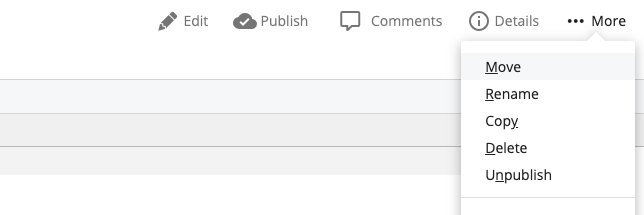
- Click the “More” menu on the right of the window and then highlight and select the “Move” tab

- Click on the current folder to search for the folder you would like to move it to

- Choose the folder you would like to move your file to from the “Recent” folder list or “Browse” to find and select the destination folder

- Ensure that the "Unpublish Content" check box is checked. This will prevent orphaned files on your website.
- Click “Move” to finish

- If your asset was successfully moved to the new location you should see the appropriate alert at the bottom of the page.

